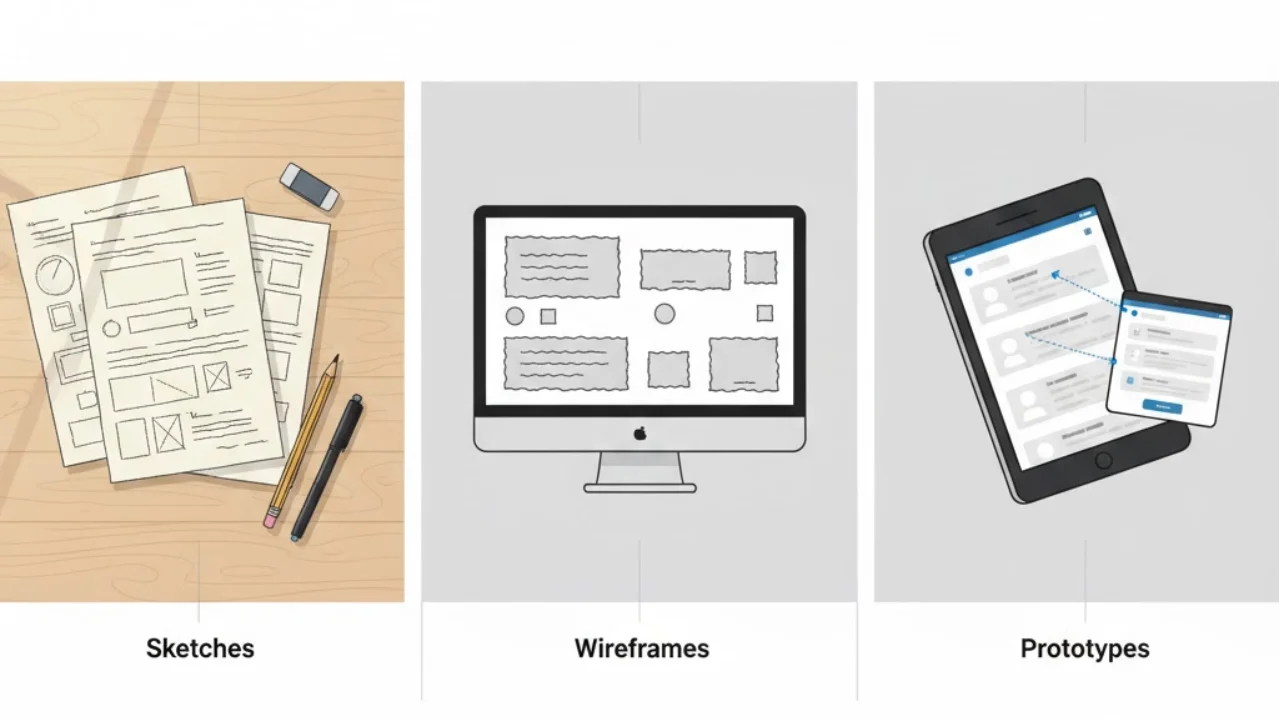
Prototyping is one of the most powerful tools in a product builder’s toolkit. As someone who leads design and product projects at Parallel, I’ve seen teams succeed or stumble based on how they prototype. The tension between “low fidelity vs high fidelity prototypes” pops up in every early‑stage conversation, and it isn’t just about style. Choosing the right fidelity means balancing speed, cost, clarity and realism – and that choice changes as the product matures. This article will unpack what fidelity means, why it matters, and how founders and product leaders can pick the right approach at the right time.
What does fidelity mean in prototyping?
Fidelity describes how closely a prototype looks and behaves like the final product. It covers three dimensions:
- Visual fidelity – how polished the interface appears. Low‑fidelity prototypes usually use simple shapes and rough sketches, while high‑fidelity versions use colours, typography and pixel‑accurate layouts.
- Interactivity – how much users can click, tap or interact with the prototype. Low‑fidelity mock‑ups often show simple flows with limited interactivity, while high‑fidelity prototypes can simulate real navigation, animations and transitions.
- Functional accuracy – how closely the prototype reflects actual data, logic and system responses. High‑fidelity prototypes may include realistic content, error handling or even code‑based logic.
Fidelity isn’t a binary concept; it sits on a spectrum. ProtoPie’s guide describes three levels – low, medium and high – noting that medium‑fidelity prototypes add basic UI elements and some interactivity, while high‑fidelity prototypes mimic final products with animations and transitions.
Why fidelity matters
Different fidelity choices lead to different outcomes. Low‑fidelity prototypes are quick and inexpensive; they help teams focus on structure and core functionality. High‑fidelity prototypes provide richer, more realistic user experiences. According to Dovetail’s comparison guide, low‑fidelity prototypes are easy to create, collaborative and inexpensive, but they offer limited accuracy and interactivity. High‑fidelity prototypes are more refined and allow designers to test detailed interactions and gather accurate feedback, yet they are costly and time‑consuming.
The choice impacts design accuracy, speed, cost, usability testing and stakeholder alignment. A rough sketch invites experimentation, while a polished interactive model might give stakeholders the impression that the product is nearly finished. Understanding these trade‑offs is crucial for early‑stage teams.
Low‑fidelity prototypes
Low‑fidelity prototypes are simple, early representations of a product. They include paper sketches, whiteboard wireframes, napkin drawings and basic digital wireframes. Miro describes them as “rough representations that focus on core functionality, structure and flow rather than polished visuals or intricate details”. Examples include:
- Hand‑drawn sketches and paper flows – quick to produce and ideal for brainstorming.
- Digital wireframes – created in tools like Balsamiq or Figma’s wireframing mode, these depict screen layouts without real images or typography.
- Clickable low‑fi prototypes – simple click‑through flows that simulate navigation between screens.
These artifacts intentionally avoid detailed visuals. Justinmind points out that early prototypes should demonstrate core functionality and information architecture without getting bogged down in typography or colour schemes.
Key characteristics
1) Speed of creation. Low‑fi prototypes can be produced in minutes or hours. Dovetail notes they are “fast and flexible,” allowing teams to try many ideas and quickly adjust. Because they focus on structure rather than detail, non‑designers can participate.
2) Low cost. They require little more than pens, paper or basic software. ProtoPie emphasises that low‑fi prototypes are affordable and encourage design thinking since anyone can produce them. Dovetail highlights that the low investment gives teams more freedom to iterate and fail without worry.
3) Limited interactivity. Simple click‑through flows are possible, but complex interactions are not. Miro explains that low‑fi prototypes might show connections between screens but exclude sophisticated behaviour.
4) Minimal visual design. They use basic shapes and “grey boxes” with placeholder text, deliberately avoiding polished visuals.
Strengths
Low‑fi prototypes shine when you need to:
- Validate core flows. They allow teams to test whether the overall structure and information architecture make sense. Because visuals are minimal, feedback centres on the concept rather than aesthetics.
- Encourage experimentation. Their speed and low cost invite multiple iterations. Miro notes that unpolished designs make people comfortable pointing out flaws and exploring alternatives.
- Engage the whole team. Non‑designers can sketch ideas and contribute. Dovetail points out that low‑fi prototypes are easy and collaborative.
- Avoid early commitment. Nielsen Norman Group highlights that designers feel less attached to rough prototypes and are more willing to change them.
- Set expectations. Rough visuals communicate that the product is far from finished. NNG notes that stakeholders recognise a sketch as work in progress and are less likely to demand immediate release.
Limitations
Low‑fi prototypes have drawbacks:
- Limited realism. Because they lack detail, users may need to imagine interactions. Miro cautions that they are not ideal for final stakeholder presentations and may lead to misinterpretation.
- Poor at simulating complex interactions. Important behaviours such as animations or dynamic data can’t be tested. ProtoPie points out that low‑fi prototypes have limited interactivity and can oversimplify complex issues.
- Less reliable for usability testing. Dovetail explains that their basic layouts and limited functions mean that users must imagine how the real product would work.

When to use low‑fidelity
Low‑fi prototypes are best during early discovery. Use them to brainstorm, explore several concepts, validate user flows and information architecture, and align on core functionality. Miro recommends them for early‑stage concept exploration, validating basic flows and iterating quickly. Dovetail adds that they help decide whether a product is needed at all. In practice, a founder and product manager might sketch an onboarding flow on paper, share it with the team, iterate several times, then use a simple tool like Balsamiq to create a clickable version for internal feedback.
Example
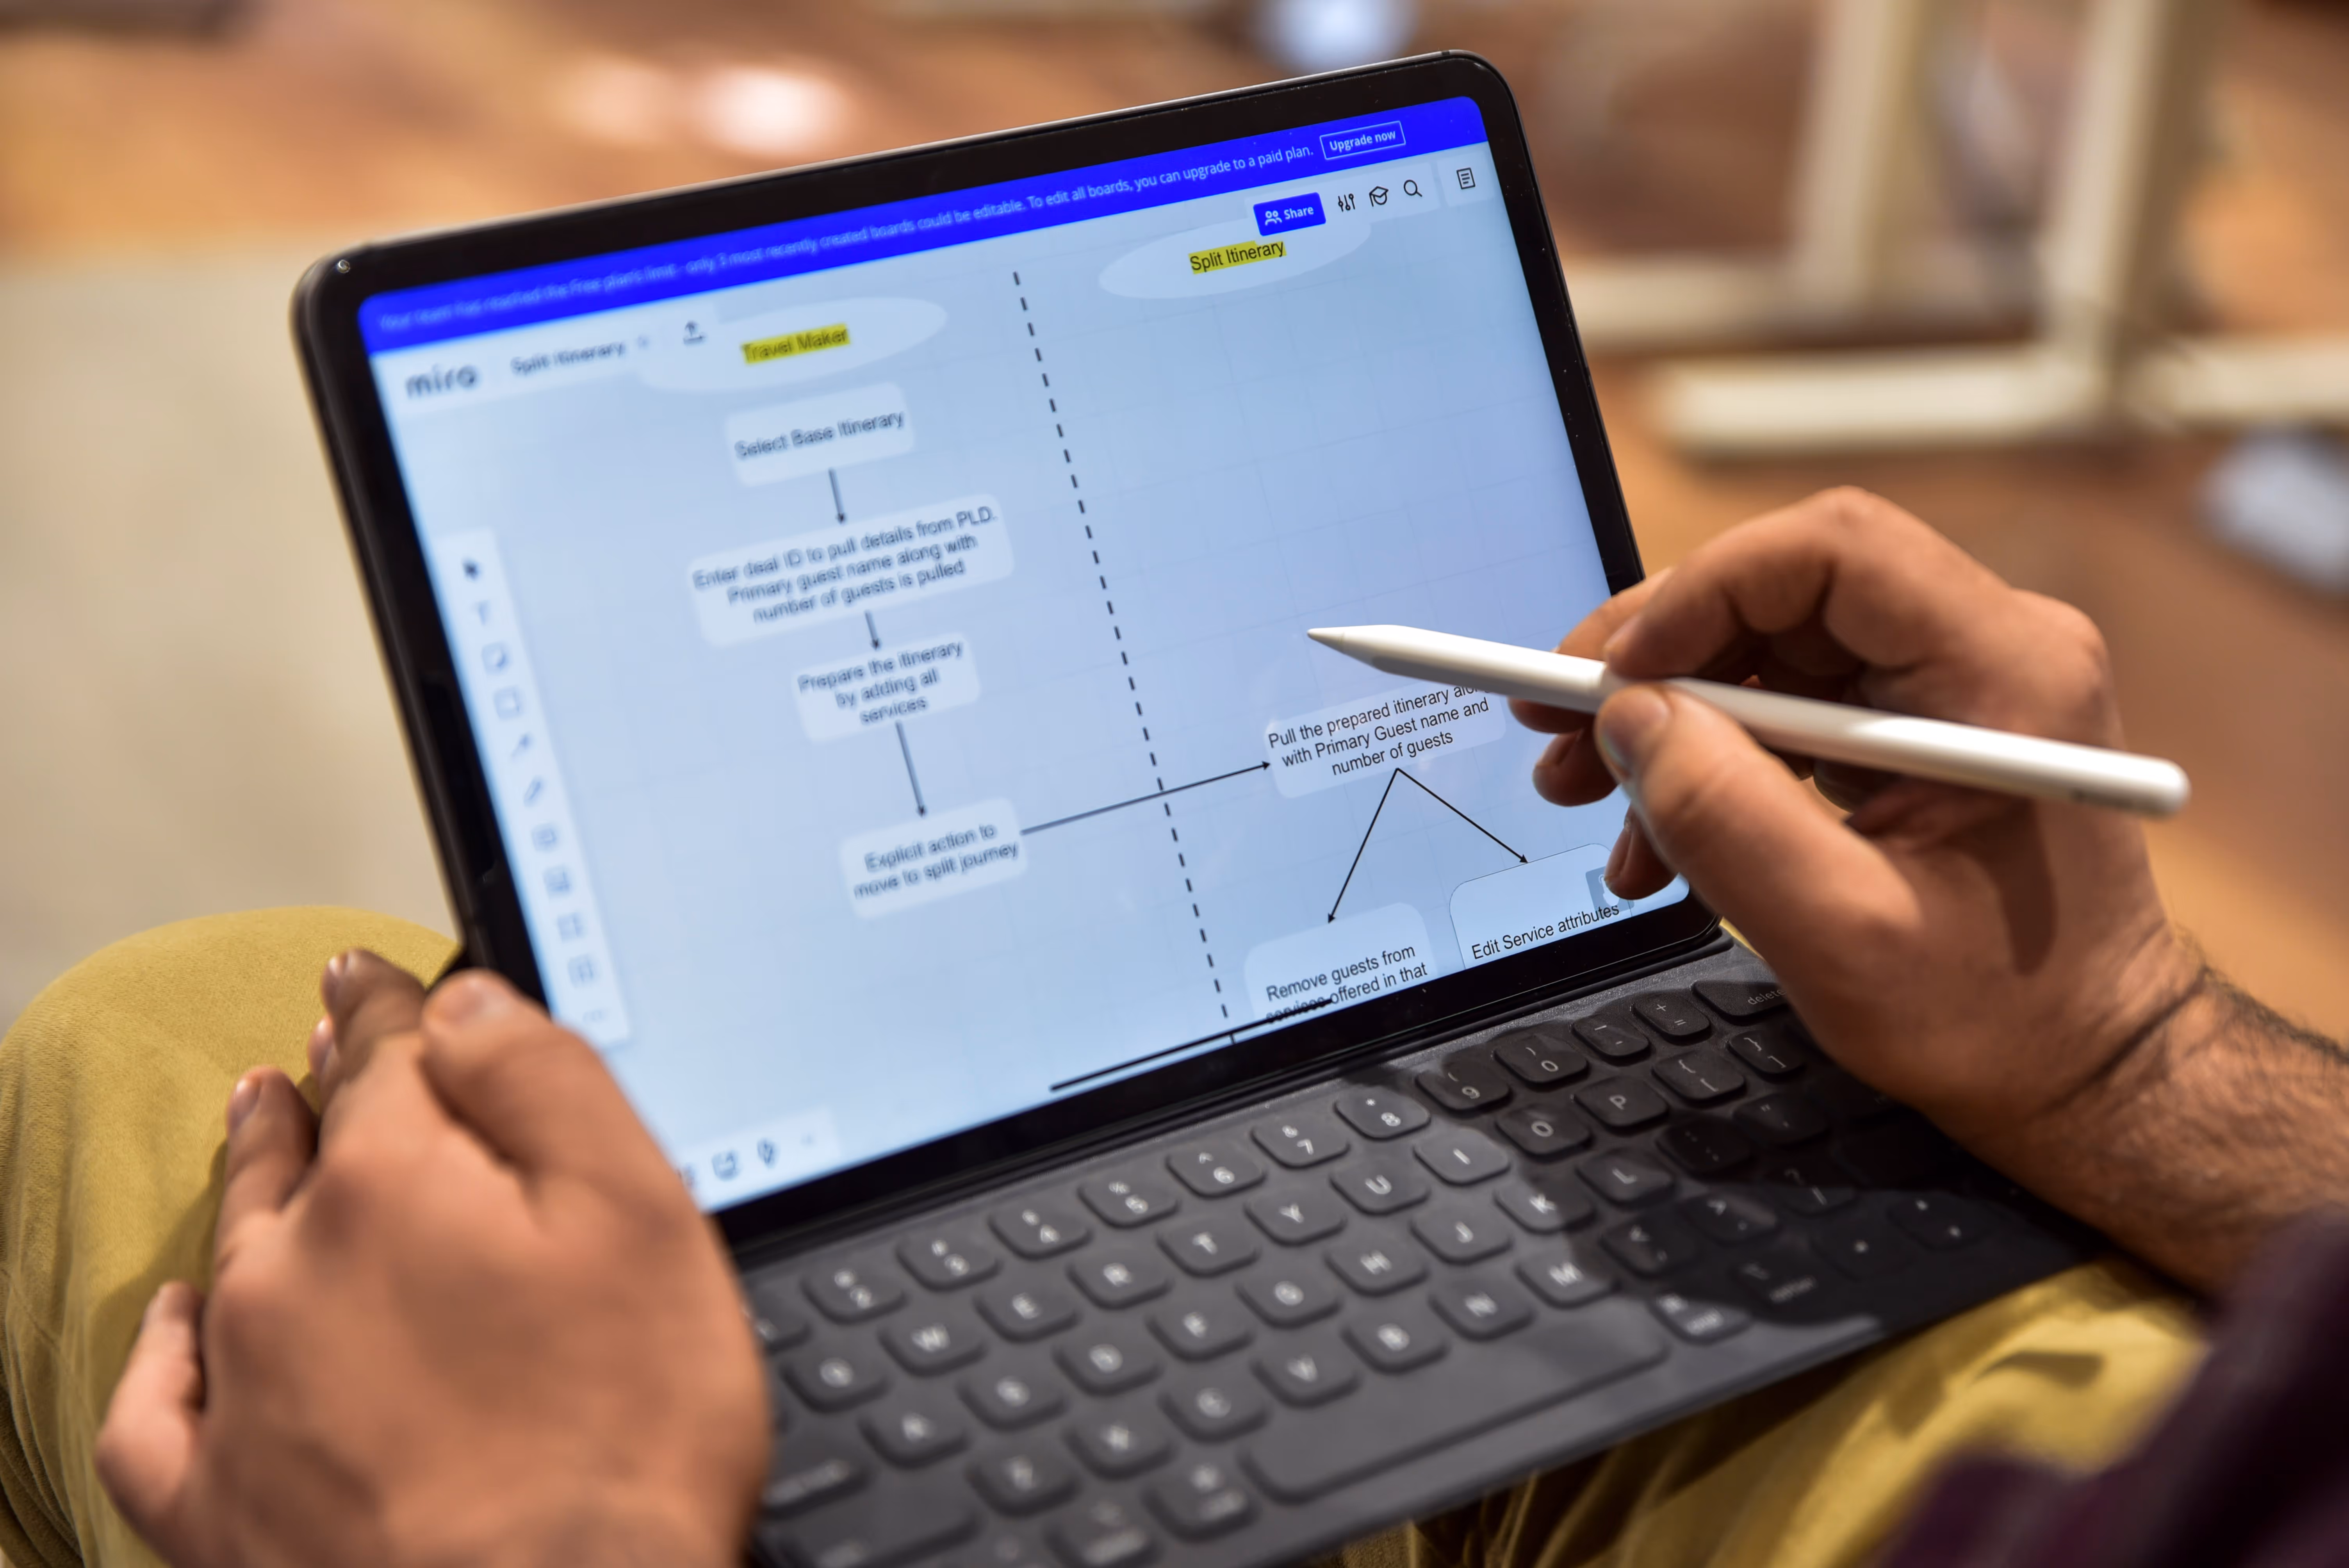
In one of our early projects at Parallel, a SaaS founder wanted to test whether her onboarding sequence made sense. We resisted the urge to dive into Figma and instead started with hand‑drawn wireframes. We mapped the flow on sticky notes, recreated it in Balsamiq and clicked through it with team members. That rough prototype revealed a major friction point in the sign‑up process. Because the design was low‑fi and fast to change, we scrapped the problematic step and iterated a new flow in a single afternoon. The founder later told us this approach saved weeks of future rework.
High‑fidelity prototypes
High‑fidelity prototypes simulate the finished product as closely as possible. Justinmind describes them as pixel‑perfect imitations of the final product with realistic content, colours, typography and advanced interactions like scrolling or drag‑and‑drop. They may take the form of:
- Detailed digital prototypes – built in tools such as Figma, Adobe XD or ProtoPie, they showcase realistic UI elements and transitions.
- Coded prototypes – interactive models built with actual code to test complex interactions or performance.

Key characteristics
1) High design accuracy. High‑fi prototypes aim to look like the finished product. They use refined typography, colours and spacing, and show realistic content.
2) Rich interactivity. Users can click through realistic navigation, interact with forms, experience animations and transitions, and sometimes manipulate data. This richness enables accurate testing of micro‑interactions and edge cases.
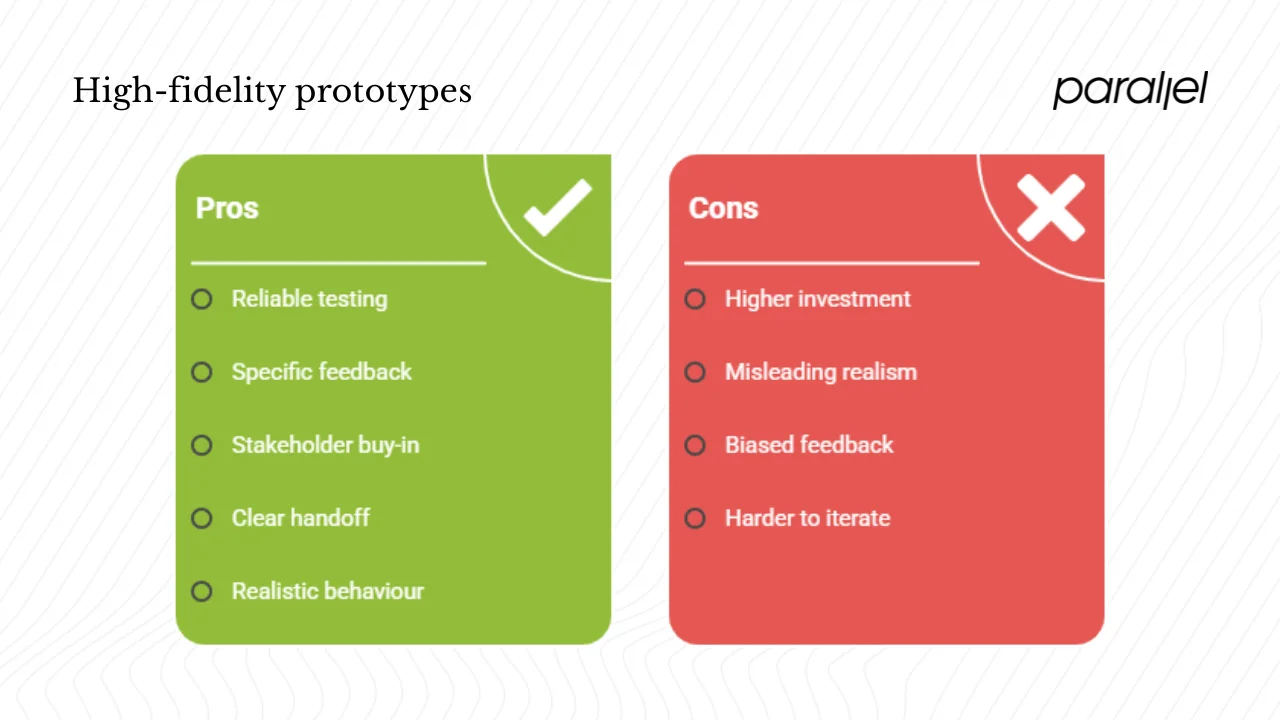
3) Greater cost and time. Creating polished visuals and interactions requires design expertise and often collaboration with engineers. Dovetail notes that high‑fi prototypes are expensive and time‑consuming. Teams should be cautious about investing too early.
Strengths
High‑fi prototypes offer advantages that low‑fi prototypes cannot:
- Reliable usability testing. Because they mimic real products, users interact more naturally. Dovetail stresses that high‑fidelity models provide reliable insights and help uncover serious weaknesses.
- Specific feedback. They allow designers to refine visual design elements, motion and micro‑interactions. The Miro guide explains that high‑fi prototypes are essential for fine‑tuning interactions and identifying subtle issues.
- Stakeholders buy‑in. A polished prototype makes a vision tangible. Miro notes that high‑fi prototypes are persuasive for executives and investors.
- Clearer developer handoff. Detailed prototypes act as a blueprint for engineers. Justinmind points out that high‑fi prototypes make it easier for developers to code the real product.
- Realistic system behaviour. NNG highlights that high‑fidelity prototypes have realistic system responses, reducing lag and improving flow during usability tests.
Weaknesses
Despite their strengths, high‑fi prototypes have limitations:
- Higher investment. NNG warns that more work means designers are less willing to change the prototype. Dovetail emphasizes that high‑fi prototypes demand significant time and resources.
- Misleading realism. Stakeholders may think the product is ready to ship because it looks real. This can pressure teams to skip validation and move straight to development.
- Biased feedback. Users may focus on visual imperfections rather than structural issues. Miro cautions that polished visuals can distract from core functionality.
- Harder to iterate. Changing polished designs takes longer. Dovetail notes that high‑fi prototypes are less flexible.
When to use high‑fidelity
High‑fi prototypes are valuable later in the design process when core flows are validated. Miro recommends using them to test specific interactions, present to stakeholders or prepare for development. Justinmind adds that once basic functionality is achieved, high‑fi prototypes help refine interactions, test accessibility and ensure designers, product managers and clients have control over direction. Use them when:
- The team has validated the user flows and information architecture.
- You need to test complex interactions, animations or edge cases.
- You’re preparing for usability testing with representative tasks.
- You’re seeking final sign‑off from executives, investors or clients.
Example
A fintech startup approached Parallel to refine its mobile checkout flow. After validating the core steps with a low‑fi wireframe, we built a high‑fi prototype in Figma with real images, brand colours and micro‑interactions. We tested this version with five target users, observing where they hesitated and which animations confused them. Their feedback led to subtle but critical changes: simplifying the transition between the billing and payment screens and improving the visual hierarchy of the order summary. Because we invested in a high‑fi prototype at the right time, we uncovered these issues before any code was written, saving weeks of engineering rework.
Comparing low vs high fidelity – the trade‑offs
| Attribute | Low-fidelity | High-fidelity |
|---|---|---|
| Speed of creation | Fast | Slower |
| Cost/resources | Minimal investment | Greater investment |
| Visual detail | Rough shapes and basic layout | Pixel-accurate UI, colours, typography |
| Interactivity | Limited, simple click-throughs | Rich, complex interactions and animations |
| User testing focus | Early flows, information architecture | Detailed usability, motion and visual refinement |
| Suitable stage | Early ideation, discovery | After validating flows; pre-development |
| Stakeholder engagement | High-level discussion and feedback | Persuasive demonstrations and approval |
Matching to key themes
The choice of fidelity influences several design themes. Low‑fi prototypes align with wireframing and core structure, whereas high‑fi prototypes emphasise visual detail and interactivity. User testing happens at both levels but with different focus: lo‑fi for broad flows and hi‑fi for detailed usability. Cost effectiveness and speed favour low‑fi; development handoff and investor presentations favour high‑fi. The purpose of the prototype and its stage in the process should guide the fidelity choice.
Decision factors for startup teams
When deciding between low and high fidelity, founders and product leaders should ask:
- What question are we trying to answer? Is it about concept viability, user flow, detailed interactions or visual polish?
- Where are we in the product lifecycle? Early discovery favours rough sketches; later stages warrant refined prototypes.
- What resources do we have? Low‑fi prototypes need little time; high‑fi prototypes demand more design and engineering effort.
- Who is giving feedback? Internal teams and early adopters can work with lo‑fi, while investors and non‑technical clients often need high‑fi.
- What are the risks of mis‑feedback? A sketch might not show nuance; a polished prototype might hide structural flaws.
Insights from research
Research suggests that both low‑ and high‑fidelity prototypes can reveal usability issues. A study comparing paper and functional prototypes found that unique characteristics of different prototypes affect the usability evaluation, highlighting the importance of choosing the right method for the aspect being tested. High‑fidelity models make participants behave more realistically, but they also risk producing biased feedback if users focus on surface details. Low‑fidelity models encourage honest reactions because they appear unfinished.
Implications for early‑stage startups
For early‑stage founders and PMs, the temptation to jump straight into Figma can be strong. Resist it. Starting with low‑fi prototypes allows you to test flows, validate concepts and adjust quickly without expensive design work. Use high‑fi prototypes when you need higher confidence, such as for usability testing, investor demos or developer handoff. Maintain a mindset of iterating from rough to refined, balancing speed with accuracy.
Choosing the right fidelity at the right time
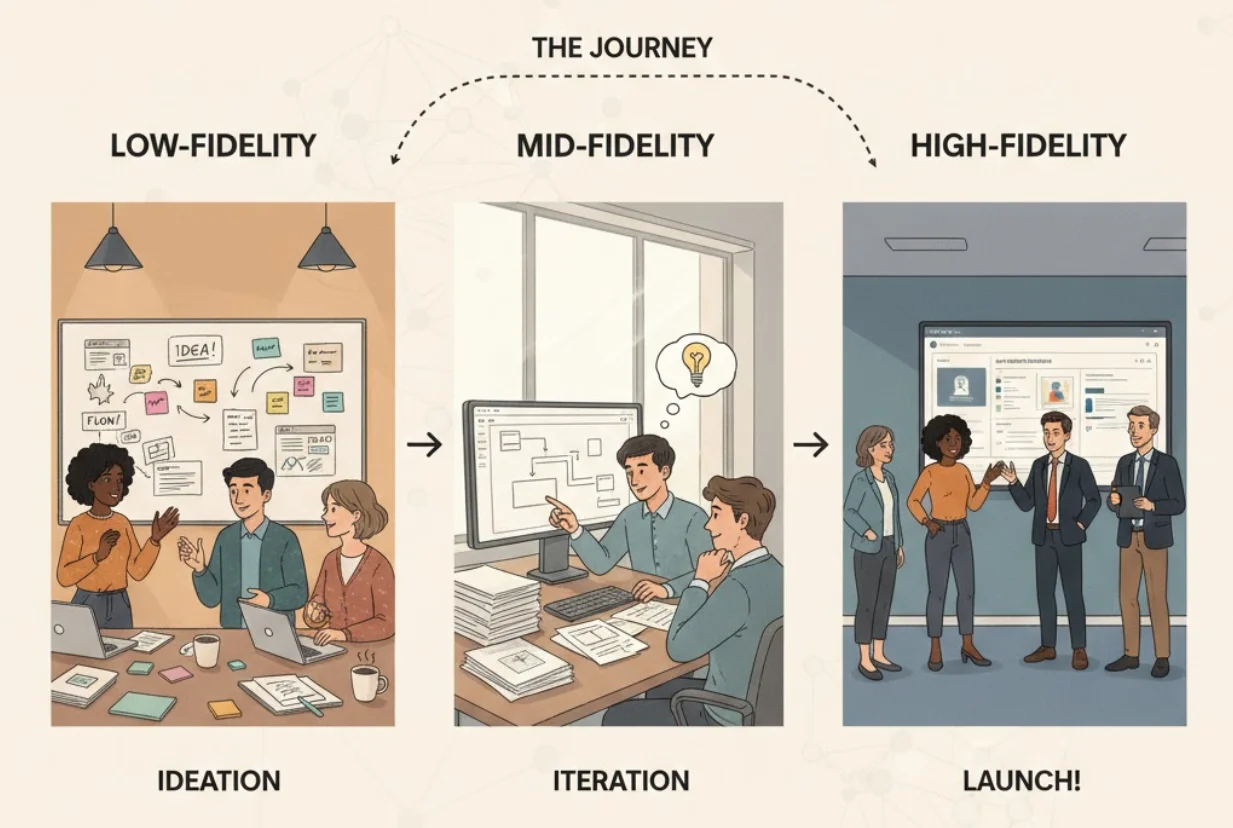
Fidelity by stage
Ideation and discovery. In the earliest phase, the goal is to understand the problem space and test core assumptions. Low‑fi prototypes like sketches, wireframes and simple click‑through flows are ideal. They encourage divergent thinking and help teams compare multiple directions.
Mid‑stage prototyping. Once the concept has traction, medium fidelity may be appropriate for key flows. This might include more accurate layouts and some interactivity, providing a middle ground between speed and realism.
Pre‑development and handoff. When flows are stable and the team is preparing to hand designs to engineering, high‑fi prototypes provide the detail and clarity needed. They help test edge cases, refine micro‑interactions and ensure developers understand the intended behaviour.
Purpose and audience
Consider the audience when choosing fidelity:
- Internal workshops. Rough sketches and wireframes encourage participation and keep focus on structure.
- External user testing of major flows. Medium‑ to high‑fi prototypes help participants understand tasks without being distracted by unfinished visuals.
- Investor or client demos. High‑fi prototypes are persuasive and convey a clear vision.
Iteration strategy
Move gradually from low to high fidelity. Start with rough sketches to explore options. As the direction stabilises, increase fidelity for selected flows. Avoid skipping the low‑fi stage; even though modern tools make high‑fi prototypes easy to create, you risk missing structural issues and wasting effort. Conversely, don’t stay in low‑fi mode too long; once core flows are validated, investing in detail will uncover issues you might otherwise miss.
Budget and resources
Assess how much time and expertise you can commit. Low‑fi prototypes require minimal skills and materials. High‑fi prototypes often involve design specialists, copywriters and sometimes engineers. Dovetail warns that without an existing design library, higher fidelity means higher costs.
Practical checklist
To decide on fidelity, ask yourself:
- What question do we want to answer? (Concept viability, flow efficiency, interaction polish?)
- Who will review or test it? (Team members, early adopters, investors?)
- How mature is our product? (Idea stage, refining stage, ready for build?)
- What resources can we spend? (Time, design expertise, technical skills?)
- Have we set expectations about what the prototype is and isn’t? Communicating that a high‑fi prototype is still a prototype prevents false assumptions.
Best practices and tips
Working with low‑fidelity prototypes
- Focus on structure and flow. Don’t worry about fonts and colours; concentrate on navigation and task completion.
- Use simple placeholders. Grey boxes and lorem ipsum keep the discussion on functionality.
- Invite cross‑functional input. Encourage product managers, engineers and even customers to sketch their ideas.
- Set expectations. Remind viewers that these are rough drafts and not the final interface.
- Test assumptions early. Present your lo‑fi prototype to users to validate major flows before investing more time.
Working with high‑fidelity prototypes
- Use realistic content. Include actual copy, images and data to simulate real usage.
- Build in interactions and transitions. Simulate animations, hover states and error states to mirror the real experience.
- Prepare targeted tasks. Write representative scenarios that test specific interactions and edge cases.
- Manage expectations. Make it clear that despite polished visuals, the prototype is not finished code and still subject to change.
- Iterate deliberately. Treat the high‑fi prototype as a living document, updating it based on feedback rather than freezing it.
Avoiding common pitfalls
- High‑fi too early. Jumping into a polished prototype before validating flows can lead to expensive changes later. Early prototypes should be rough, rapid and “right” for the question at hand.
- Staying lo‑fi too long. If you rely solely on sketches, you may miss subtle design issues, micro‑interactions or stakeholder buy‑in. Add refinement when you need feedback on visuals or interactions.
- Mis‑matching fidelity to purpose. Using high‑fi prototypes for quick concept validation wastes time; using low‑fi prototypes for detailed usability testing yields limited insight.
- Unclear prototypes. Low‑fi prototypes lacking annotations can confuse testers; high‑fi prototypes can mislead if users think they are final. Document your intent and test goals.
Iteration and feedback loop
After each prototype, gather feedback from team members, stakeholders and users. Use that feedback to refine your design. Move gradually from sketch to medium fidelity to high fidelity. IDEO’s prototyping principles advocate adding refinement only when necessary and embracing pivots; they suggest that early prototypes should be rough and rapid so you can build more and learn more. Keep a record of what each prototype aims to answer and document feedback for future reference.
A founder’s perspective
Working with startups has taught me that prototype fidelity is as much a cultural decision as a technical one. Founders often equate high‑fi prototypes with professionalism and assume investors will only be impressed by polished visuals. In my experience, a rough sketch on a whiteboard can be far more valuable at the beginning. It invites conversation and reveals whether a concept is even worth pursuing.
At Parallel, we’ve helped early‑stage teams working in artificial‑intelligence and SaaS domains shape their products. In one case, a team designing a machine‑learning‑driven dashboard jumped straight into a polished UI. Weeks later, they realised users didn’t understand the underlying workflow. We stepped back, sketched the flow on paper, and discovered that the value proposition itself needed rethinking. Had we continued refining visuals, we would have wasted time on a fundamentally flawed flow.
Once the core structure is solid, we move to medium and high fidelity for selected flows. For example, we recently worked with a generative‑technology platform to revamp its onboarding. We started with sketches to align on steps, built a click‑through wireframe for early user feedback, then invested in a high‑fi prototype with polished visuals and interactions. This phased approach cut time‑to‑first‑value by about 30% and helped the team secure funding.
As a design leader, I create fidelity guidelines so everyone knows when to stay rough and when to refine. We aim to start with low‑fi for ideation, introduce medium fidelity for key screens once flows are stable, and only build high‑fi prototypes when we’re ready to test specific interactions or present to investors. This disciplined approach prevents us from falling in love with our own designs too early and helps us allocate resources wisely.
Conclusion
Both low‑fidelity and high‑fidelity prototypes have a place in the product lifecycle. The right choice depends on your goal, the maturity of your design, your resources and your audience. Start rough to validate concepts quickly and cheaply, then refine as you need more realistic feedback. Avoid confusing prototypes with finished products; communicate clearly about what your prototype is meant to test. By being intentional about fidelity, you’ll learn faster, waste less effort and build better products.
FAQ
1) What is a low‑fidelity prototype example?
A simple paper sketch of an app screen or a digital wireframe showing grey boxes and placeholder text counts as a low‑fi prototype. It might allow basic navigation by clicking “Next” to move between screens.
2) What is the difference between high‑ and low‑fidelity simulations?
Low‑fidelity simulations use rough visuals, limited interactivity and placeholder content; high‑fidelity simulations use polished visuals, realistic content and rich interactivity. High‑fi prototypes allow accurate user testing and stakeholder persuasion.
3) What is a high‑fidelity prototype?
A high‑fi prototype looks and behaves almost like the final product. It features pixel‑accurate design, real content, animations and interactive components. It is often used for usability testing or investor demos.
4) What is the main advantage of a low‑fidelity prototype?
Speed and cost: you can create and iterate quickly, test core flows and structure without investing heavily in design and engineering.

check out these related blogs